Ever wanted to take your Google Slides presentations with you, no matter where you go? Putting your slides onto a USB drive is a great way to have them accessible offline, keep them safe, and easily share them with others. In this blog post, we’ll walk you through the step-by-step process of exporting your Google Slides presentations to a USB drive. Whether you’re a student, a professional, or simply someone who wants to have their presentations handy, this guide will show you how to do it easily.
How to Put Google Slide onto USB Drive
Saving a Google Slide presentation to a USB drive is simple and useful for accessing your work offline. Here’s how you can easily transfer your slides to a USB:
1. Download Your Presentation:
- Open your Google Slides presentation.
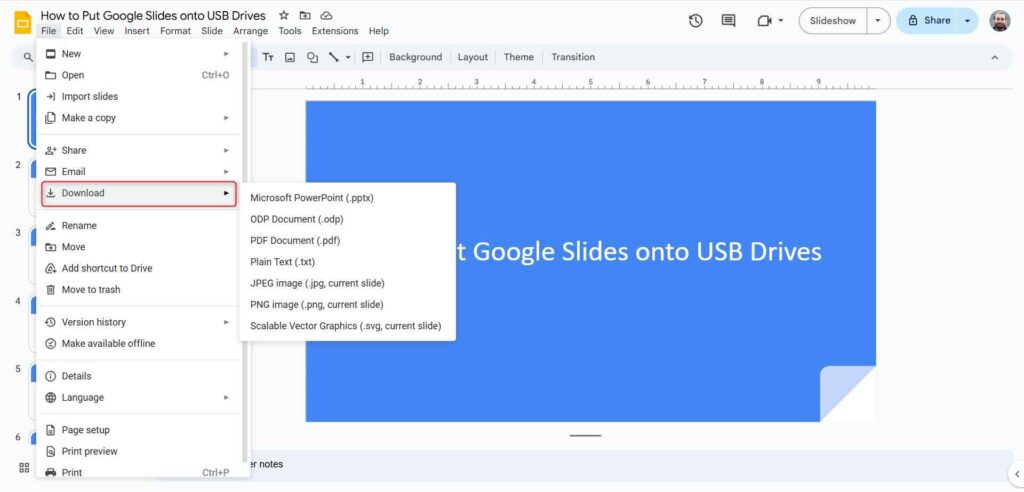
- Click on File > Download and choose your preferred format (e.g., PowerPoint, PDF).
2. Connect Your USB Drive:
- Plug your USB drive into your computer.
3. Transfer the Downloaded File:
There are a few ways to do this:
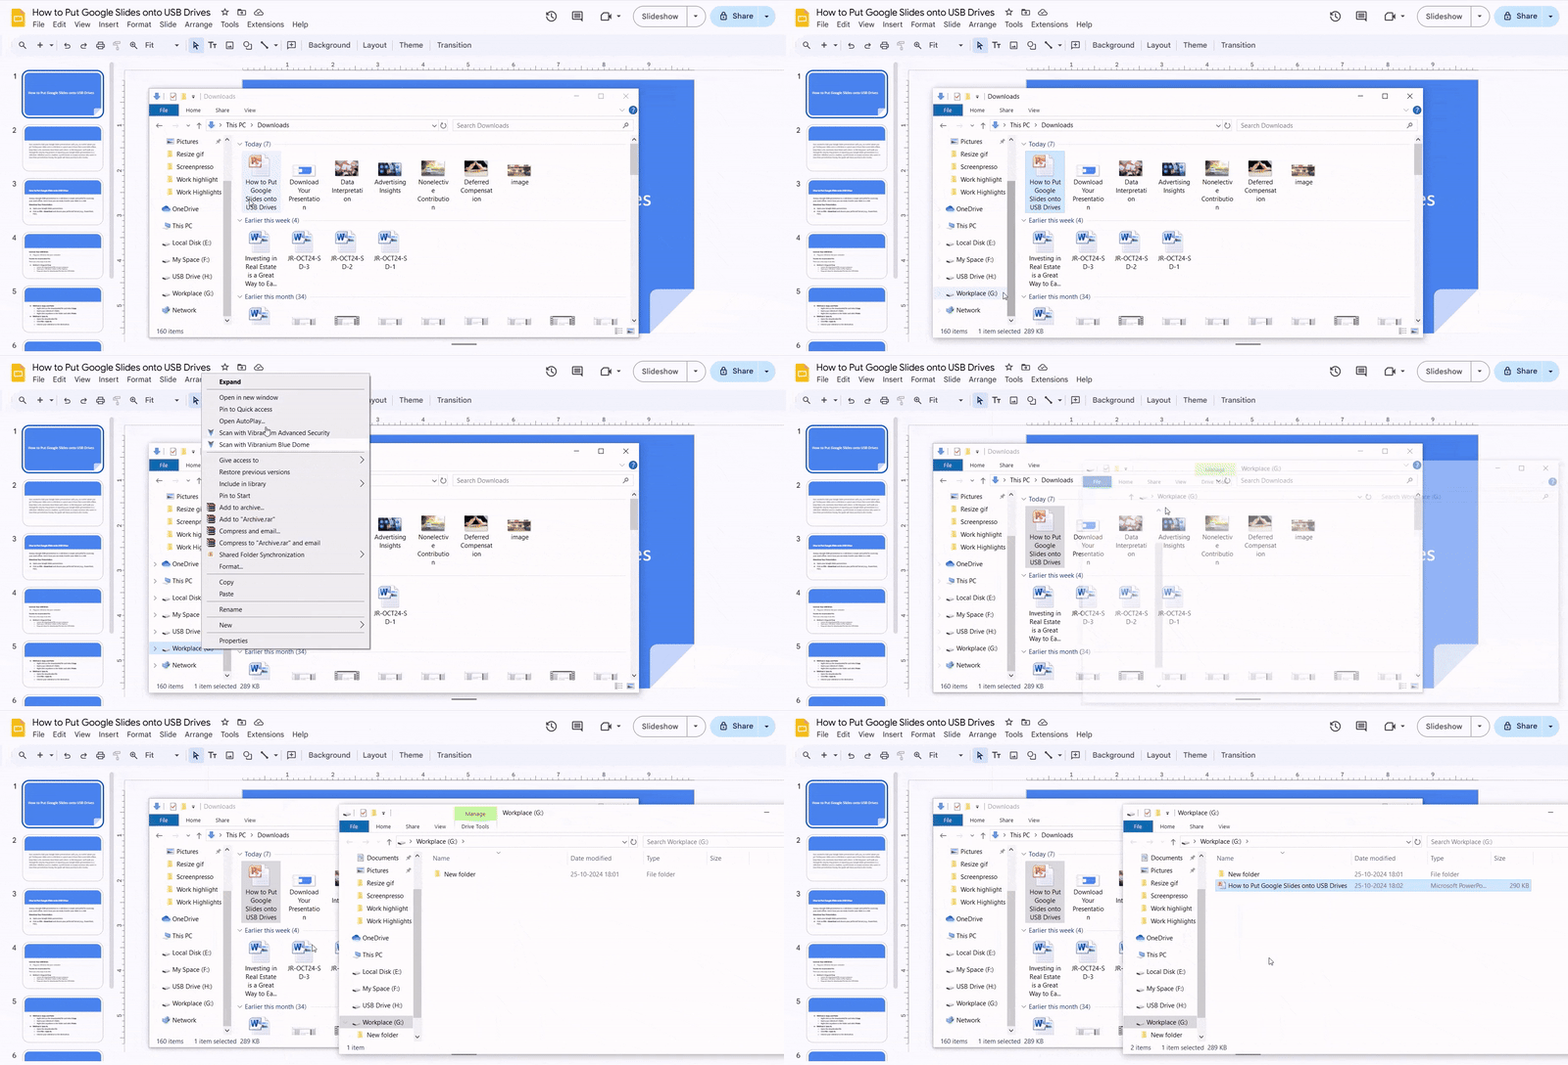
- Method 1: Drag and Drop
- Locate the downloaded file on your computer.
- Open your USB drive’s folder in File Explorer.
- Drag and drop the downloaded file into the USB folder.
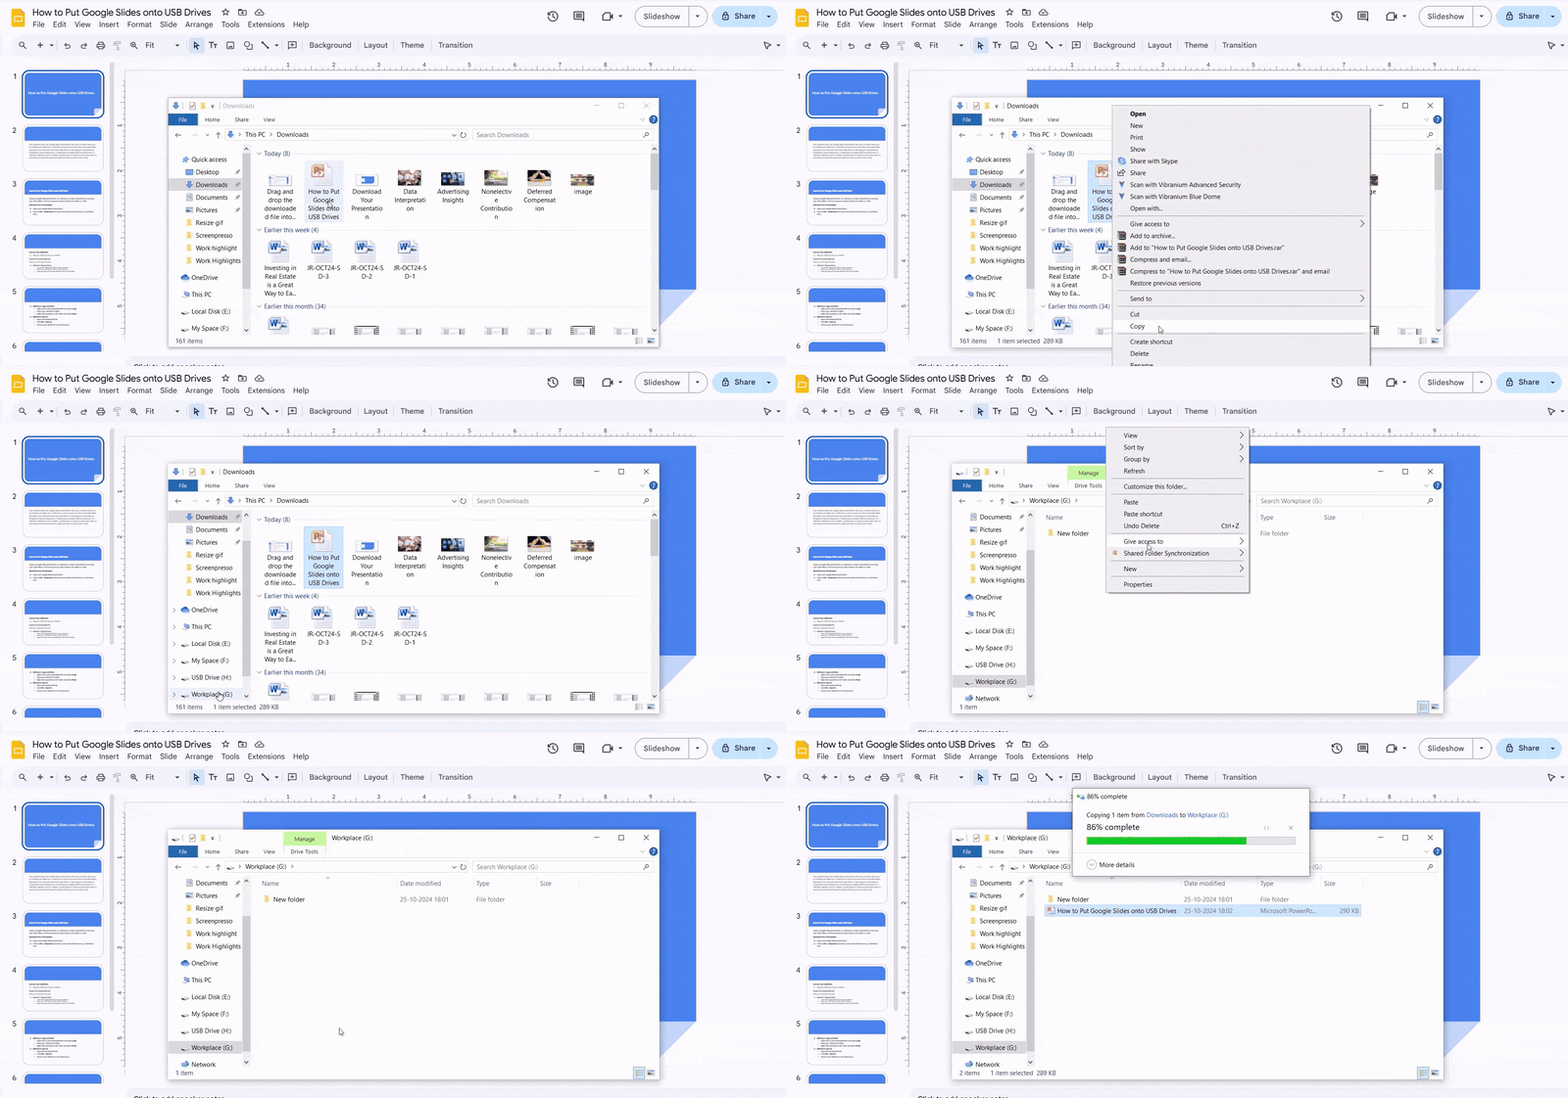
- Method 2: Copy and Paste
- Right-click on the downloaded file and select Copy.
- Open your USB drive’s folder.
- Right-click anywhere in the folder and select Paste.
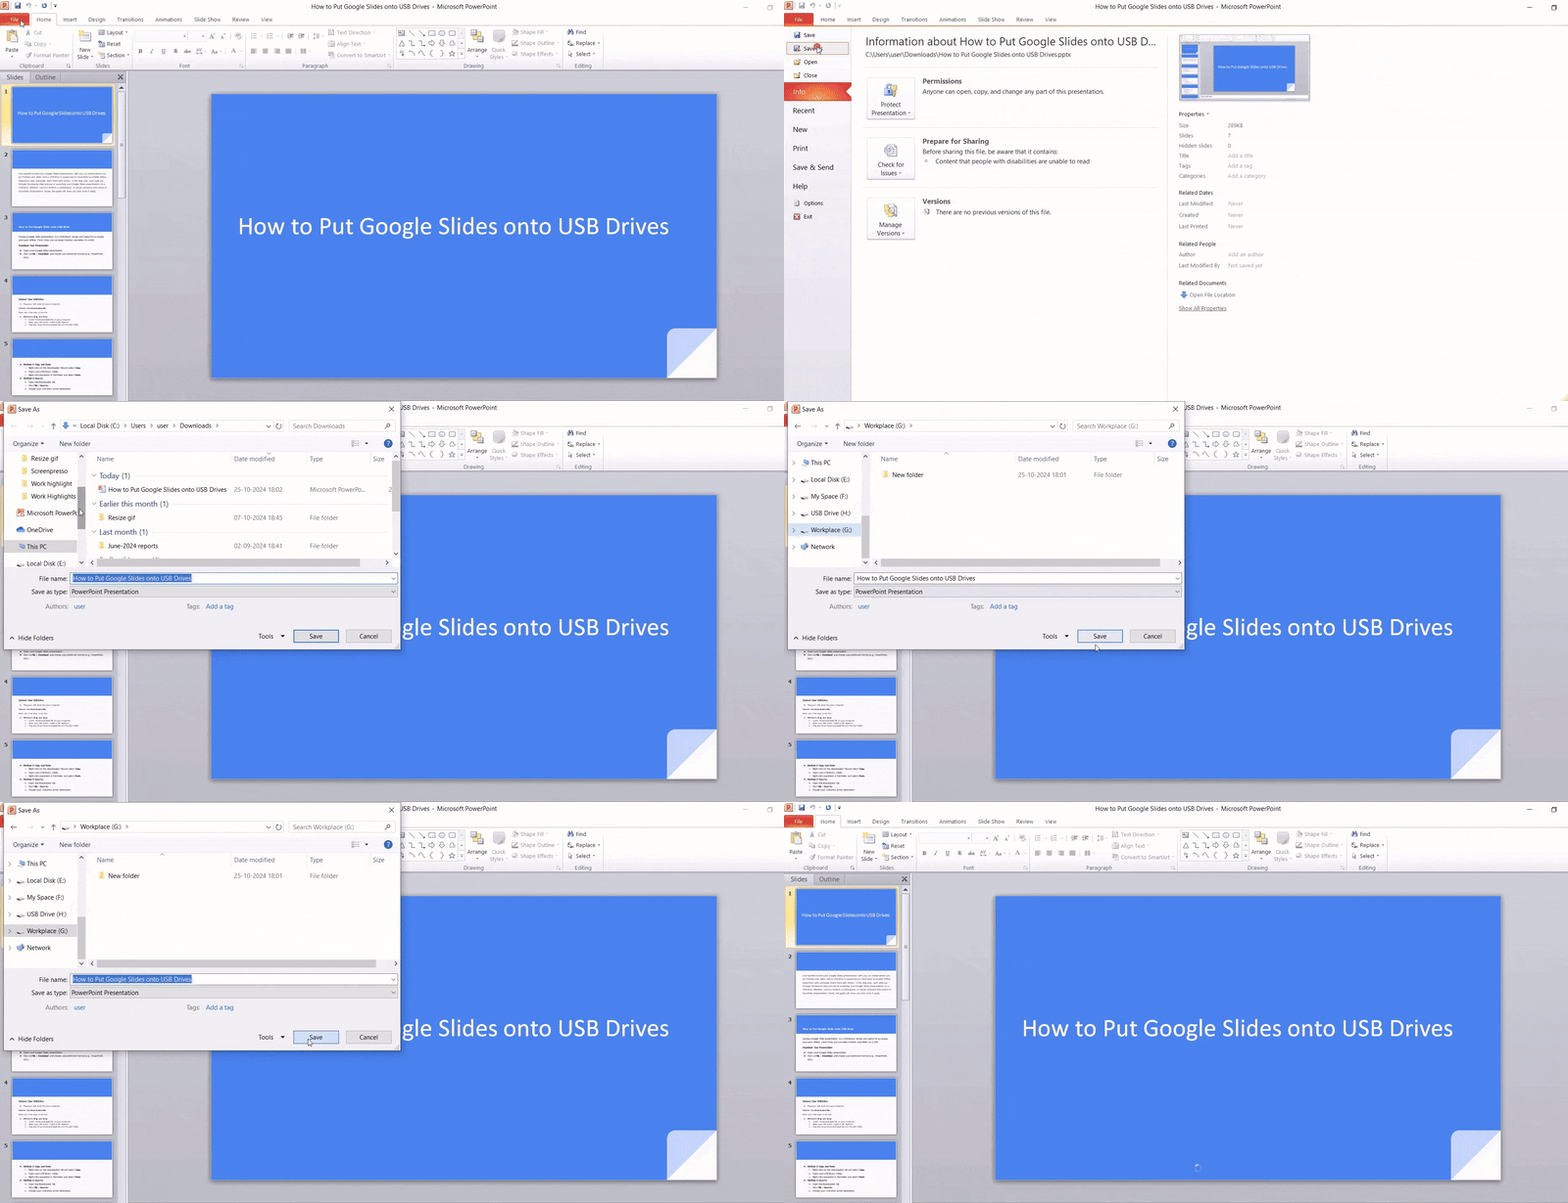
- Method 3: Save As
- Open the downloaded file.
- Click File > Save As.
- Choose your USB drive as the destination.
4. Verify the Transfer:
- Check your USB drive to ensure the file has been copied successfully.
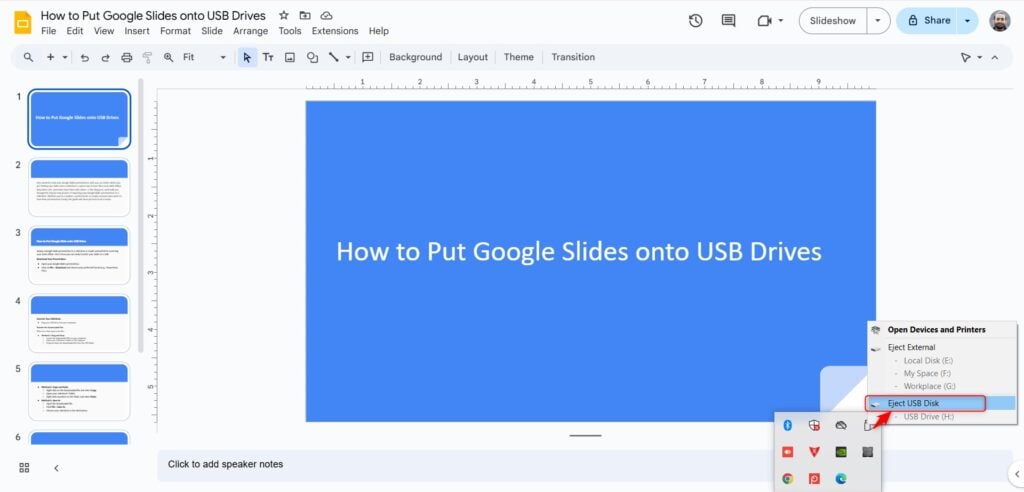
5. Safely Eject:
- Before unplugging your USB drive, always eject it properly to prevent data loss.
- On Windows, click the “Safely Remove Hardware and Eject Media” icon in the system tray.
- On macOS, drag the USB drive icon to the Trash and wait for the confirmation message.
Closing Thoughts
Taking your Google Slides presentations with you on a USB drive is quick and easy. By following these simple steps, you can access your work offline and share it anytime. It’s a reliable way to keep your presentations safe and portable. Try it out and have your slides ready wherever you go!
Create presentation slides with AI in Seconds in Google Slides
15M+Installs
Works with Google Slides
Frequently Asked Questions (FAQs)
1. Can I edit my Google Slides directly on the USB drive?
No, you’ll need an internet connection to edit Google Slides. You can only view and present them offline.
2. Can I add notes to my Google Slides for offline reference?
Yes, you can add speaker notes to your slides and they will be included in the downloaded file. For offline reference, you can also print out your slides with notes.
3. What is the best format for offline viewing?
PDF is generally a good choice as it maintains the formatting and layout of your slides.
