
Ever spent way too much time staring at a plain PowerPoint slide, wondering why it looks so dull? You’re not alone. A boring white background can make even the most exciting presentation feel like a snooze fest. But don’t worry, adding a picture as a background can fix that in seconds.
Whether you want to make your slides look professional, creative, or just a little less lifeless, inserting a background image is an easy way to do it. Let’s go through the steps so your presentation doesn’t put people to sleep.
Why Use a Picture as the Background in PowerPoint?
Here’s why adding a picture as a background can be useful:
1. Branding
A company logo or product image in the background can make the presentation look more connected to the brand. It helps people remember what the presentation is about.
2. Better Visual Appeal
Plain backgrounds can sometimes feel dull. A well-chosen image can make slides look better and hold the audience’s attention.
3. Stronger Connection to the Topic
The right image can make the presentation more relevant. A world map works well for a geography lesson, while creative designs fit artistic topics.
4. Personal Touch
Using images related to a project, business, or personal style makes the presentation feel unique. It helps make a stronger impression.
Create presentation slides with AI in Seconds in Google Slides
15M+Installs
Works with Google Slides
8 Steps to Insert a Picture as a Background in PowerPoint
Want to add an image as a background in PowerPoint? You can do it easily using the “Format Background” option. Just follow these steps, and you’ll have a customized slide in no time.
1. Open Your PowerPoint Presentation
First, launch Microsoft PowerPoint and open the presentation where you want to set an image as the background. Click on the slide that needs the background change.
2. Access the Design Tab
Look at the top menu and click on the “Design” tab. This section contains all the options for changing your slide’s appearance.
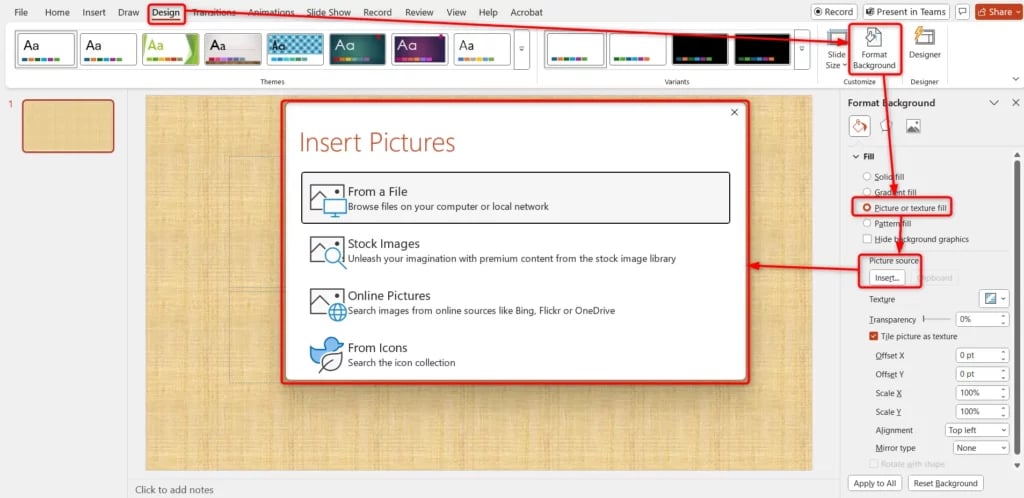
3. Open the Format Background Panel
- On the right side of the “Design” tab, click “Format Background“.
- Alternatively, right-click anywhere on the slide and select “Format Background” from the menu.
- A panel will appear on the right side of your screen. This is where you’ll make all the background changes.
4. Choose Picture or Texture Fill
In the “Format Background” panel, you’ll see different fill options. Select “Picture or Texture Fill” to insert an image as your background.
5. Select an Image Source
Now, you need to pick the image you want to use. Click on “Insert” under the “Picture Source” section, and you’ll get different options:
- From a File: Upload an image from your computer.
- Stock Images: Choose from Microsoft’s premium stock image collection.
- Online Pictures: Search for images using Bing, Flickr, or OneDrive.
- Icons: Pick an icon from PowerPoint’s built-in icon library.
- Clipboard: If you recently copied an image, select Clipboard to paste it directly.
Choose the image that best fits your slide’s design.
6. Adjust the Background
Once your image is inserted, you can tweak it for the best look. PowerPoint allows you to:
- Change Transparency: Use the slider to make the background more or less visible.
- Reposition the Image: Adjust the placement to ensure important elements aren’t cut off.
- Tile the Image: If the image is small, you can repeat it across the slide.
Play around with these settings until you’re happy with the result.
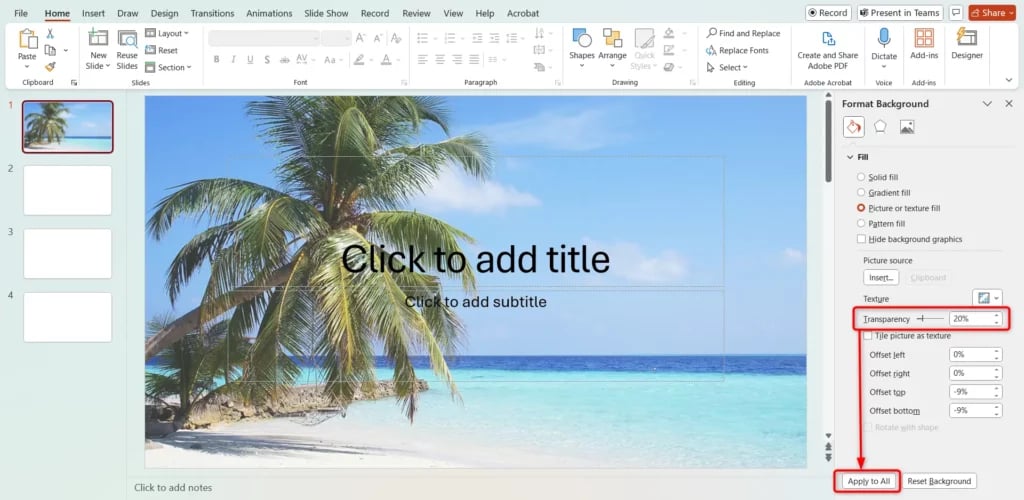
7. Apply to All Slides (Optional)
If you want every slide in your presentation to have the same background, click “Apply to All” at the bottom of the “Format Background” panel. If not, leave it as it is, and only the selected slide will change.
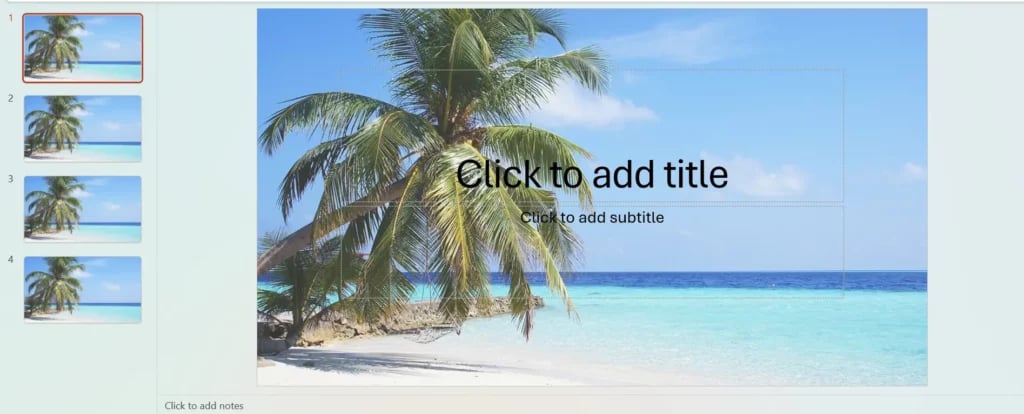
8. Close the Format Background Panel
Once everything looks good, simply close the “Format Background” panel. Your image background is now set!
Create presentation slides with AI in Seconds in Google Slides
- No design skills required
- 3 presentations/month free
- Don’t need to learn a new software
Works with Google Slides

Closing Thoughts
A good background does more than just decorate a slide. It sets the tone and makes the content more engaging. The right image can turn a dull presentation into something that grabs attention. Play around with different visuals until your slides feel just right.
Frequently Asked Questions
Can I make a picture transparent in a PowerPoint background?
Yes, you can make a picture transparent in a PowerPoint background. Once you insert the background image, go to the Format Background panel and use the Transparency slider to adjust the opacity to your liking.
How do I apply a background image to all slides in PowerPoint?
After setting your picture as the background, simply click “Apply to All” in the Format Background panel. This will make the background consistent across all slides, saving you time when designing your presentation.
What is the best image format for a PowerPoint background?
JPEG and PNG are the most commonly used formats. However, PNG is generally the better choice. It supports transparent backgrounds, has lossless compression, and maintains high image quality.
Can I use PowerPoint stock images as a background?
Yes, PowerPoint provides a library of Stock Images that you can use as backgrounds. These images are high-quality and royalty-free, giving you a range of options to enhance your presentation without worrying about copyright issues.