
If you have ever used Google Slides, you are aware that a presentation’s visuals have the power to make or break it. But sometimes, those stunning pictures might have to take a backseat.
Knowing how to delete all photos on Google Slides can be quite helpful, whether you are trying to rethink your design or optimizing the file size for easy sharing.
This blog post goes over the rationale behind eliminating these visual components, along with practical advice on how to do so effectively.
You will be well prepared to take charge of your Google Slides by the end of this article, making sure your content shines without needless interruptions.
Why Do You Need to Delete All the Photos From Google Slides?
Removing every image from Google Slides can be essential for several reasons, including the following:-
- To Cut Down on File Size
Optimizing file size is among the strongest arguments for removing images from Google Slides. Did you realize that pictures can greatly increase a presentation’s size? Generally, presentations with a lot of pictures could be five to seven times bigger than ones without.
Accordingly, if your presentation is larger than 10 MB, you can find that deleting a few photos significantly speeds up the download. This can benefit both you and your viewers.
- To Revise or Recreate
Are you using an old template with out-of-date graphics, or are you redesigning your presentation? Eliminating old photos creates a blank canvas on which you can add new, pertinent pictures that complement your revised theme or goal.
It’s similar to spring cleaning your slides. Get rid of the outdated ones and replace them with the new ones!
- To Stay Content-focused
Your audience may become distracted from the main point of your presentation if you overcrowd your slides with pictures.
A polished presentation makes your message stand out and keeps your audience interested. Visual clutter can significantly decrease knowledge retention.
How to Delete All Photos at Once on Google Slide?
Here are three simple yet effective methods to delete photos in Google Slides to keep your slideshow clean and organized.
Method 1: Selecting and Deleting Manually
Sometimes, the best course of action is to go back to the basics. Selecting and deleting photos manually in the following ways can be simple if you choose a more hands-on approach or have a small number of photos to get rid of.
- Launch your presentation in Google Slides.
- Go to the picture-rich slide. Use the slide navigator on the left if you have many slides.
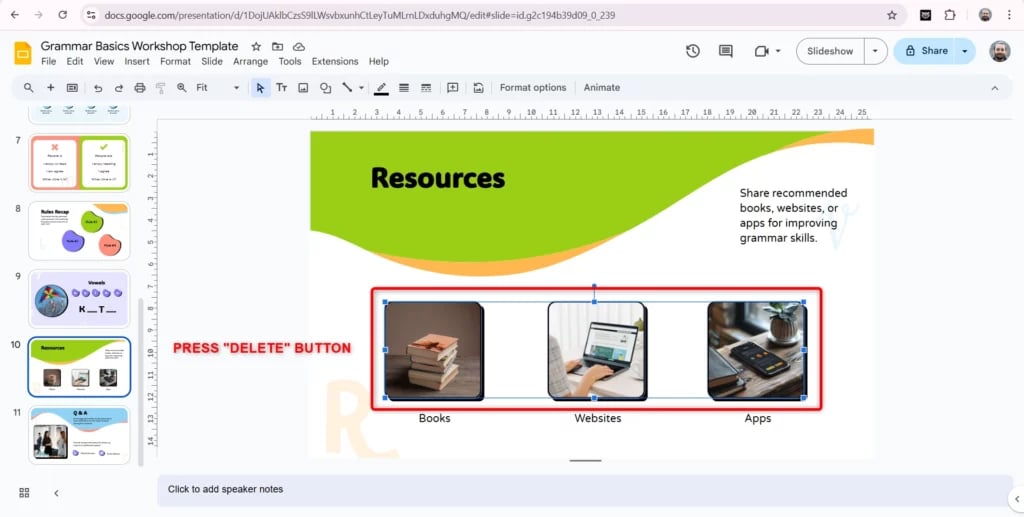
- Choose the pictures. To choose more than one image on the current slide, click on each one while holding down the Shift key.
- Hit the “Delete” button. The chosen photos will be deleted as a result. This procedure can be repeated for every slide.
Despite its apparent simplicity, this approach could take a lot of time for larger presentations. Now, let’s discuss some strategies to help you speed up the procedure.
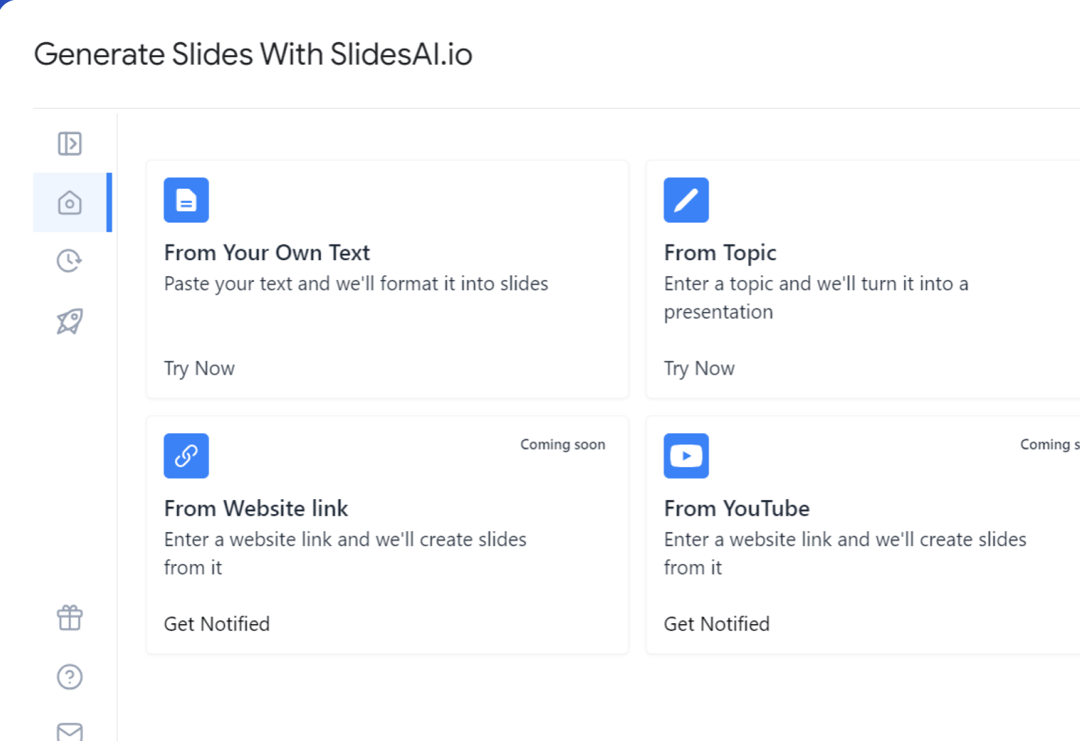
Create presentation slides with AI in Seconds in Google Slides
14M+Installs
Works with Google Slides
Method 2: Add-ons (For Large-scale Operations)
You can save a lot of time by using add-ons, particularly for mass activities. Here’s how to accomplish it:
- Installing a Google Slides add-on is step one.
- Launch your presentation.
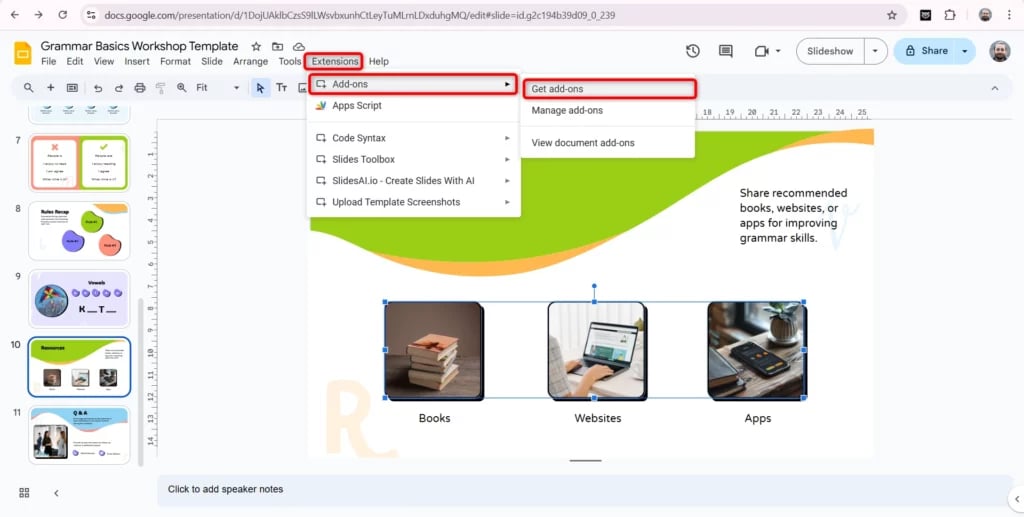
- To obtain add-ons, navigate to Extensions > Add-ons.

4. Look for resources such as “Slides Toolbox.” Install the one that best suits your needs.
5. Launch the add-on. Select Slides Toolbox > Extensions > Open.
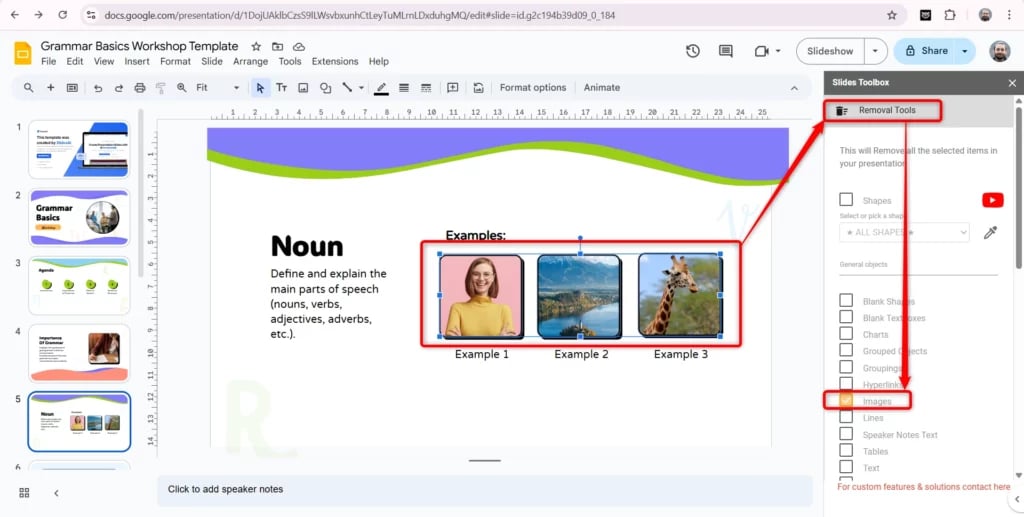
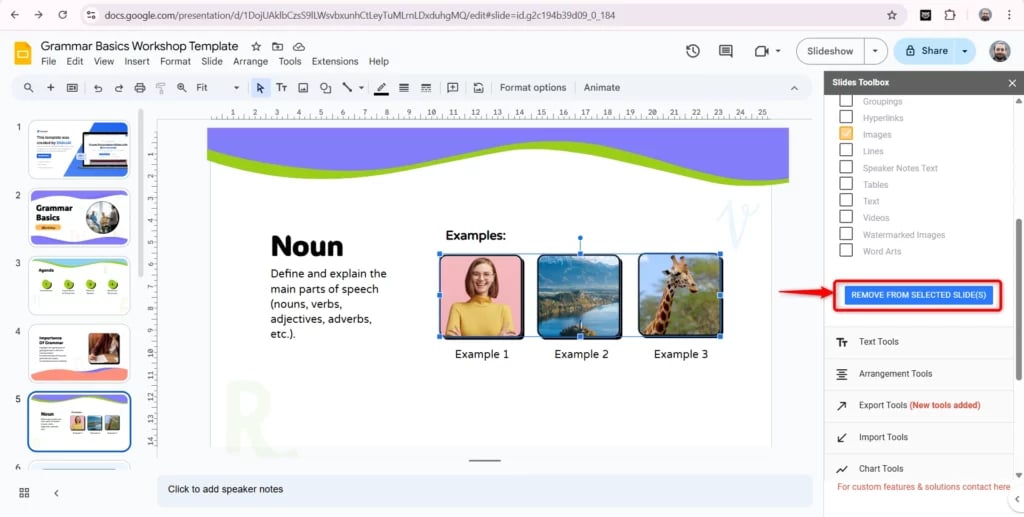
6. Take out the pictures. Look for “Remove Tools” in the toolbox, check the box next to “Images,” and then choose “Remove from selected slide(s).”
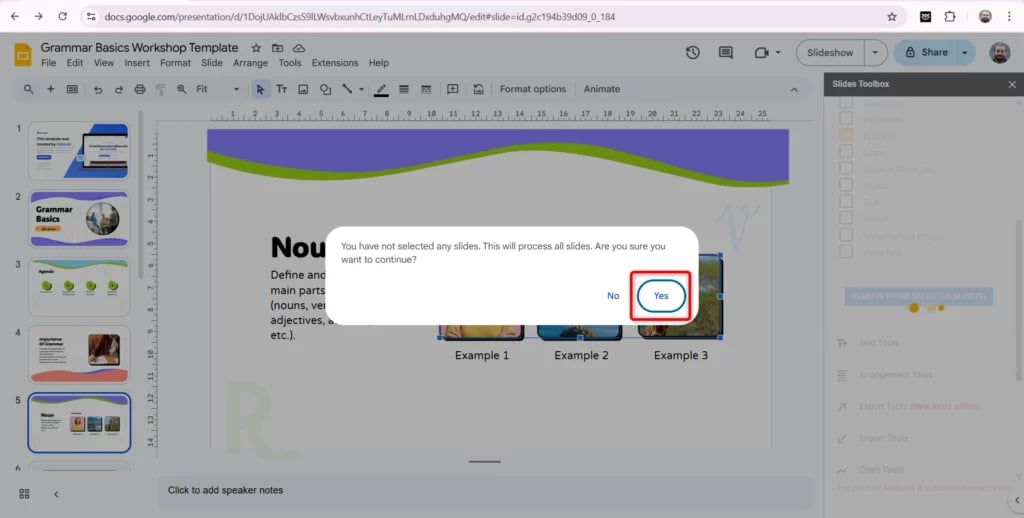
7. Verify removal from every slide.
8. You will be prompted to continue by a pop-up. When you click “OK,” all of the photos in your Google Slides presentation vanishes at once.
This technique helps you create a clean slate in a fraction of the time and is ideal for presentations with several slides that are packed with graphics.
Create presentation slides with AI in Seconds in Google Slides
- No design skills required
- 3 presentations/month free
- Don’t need to learn a new software
Works with Google Slides
Method 3: Use Master Slides (If Images are in the Master Layout)
In cases where images are embedded in the master slides, modifications can be made directly through the master layout.
Step 1: Go to the Master Layout
Click on Slide in the menu bar. Select “Edit Theme” (or Edit Master).
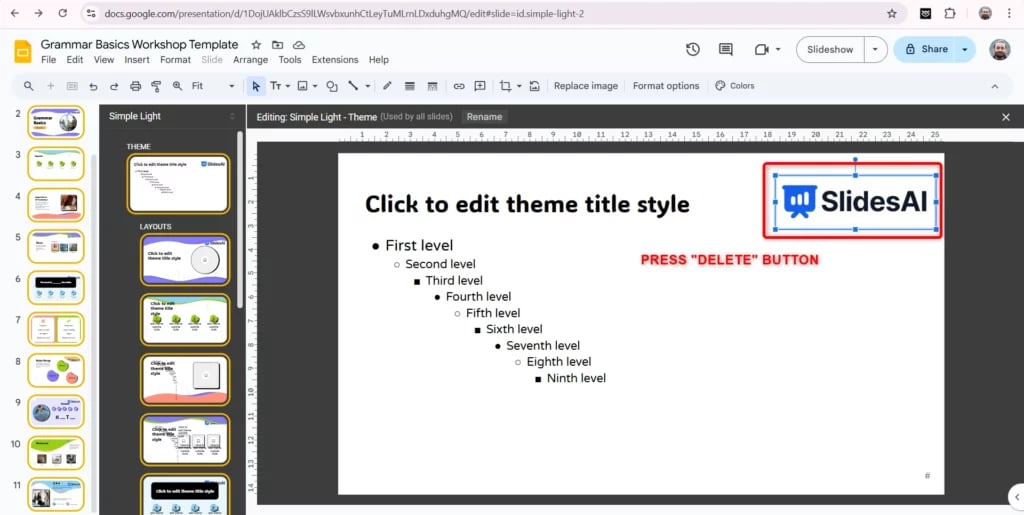
Step 2: Delete Images in the Master Layout
Inspect the master slides—if you see any images there, you can delete them easily. This will also remove the pictures from all slides using that master layout.
Step 3: Exit the Master Layout
Click on the close icon or “X” to return to your main slides.
This method helps you streamline the presentation effectively by managing images globally across all slides.
You can significantly increase performance, attention, and aesthetics by taking the time to organize the photos in your Google Slides presentations. If you value successful communication, you must know how to delete pictures on Google Slides.
From manual removal to using add-ons and altering master slides, the techniques for removing images provide you with the ability to create engaging presentations that genuinely connect with your audience.
Each slide tells a story! So, make sure yours is as impactful and clear. Additionally, there is always more to learn as you progress. Continue experimenting and make sure your audience comes away with more than a fleeting impression. Have fun with your presentation!