When making a presentation or a slide, using images is crucial, even in educational settings. It’s important to present a clear idea or objective to the audience. Making sure that the visuals, words, and backgrounds are well-matched helps convey the complete message effectively.
To enhance your presentations, you can follow the methods below. These include creating a transparent shape to highlight the subject in focus, adding a new color backdrop, and placing the subject in a unique environment for a distinctive presentation.
Google Slides is an excellent tool for visual presentations due to its ease of use and reliability. However, some find it challenging to make slides transparent. In this article, you’ll discover a solution to this issue, making your presentations in Google Slides more appealing.
Why Use Transparency in Google Slides?
Using transparency in Google Slides enhances both design and readability. Here’s why it matters:
- Improves text visibility by reducing image dominance
- Highlights important elements without distracting backgrounds
- Creates a modern, professional design
- Helps layer visuals effectively for storytelling
- Maintains visual balance across slides
How to Change Image Opacity in Google Slides? A Step-By-Step Tutorial
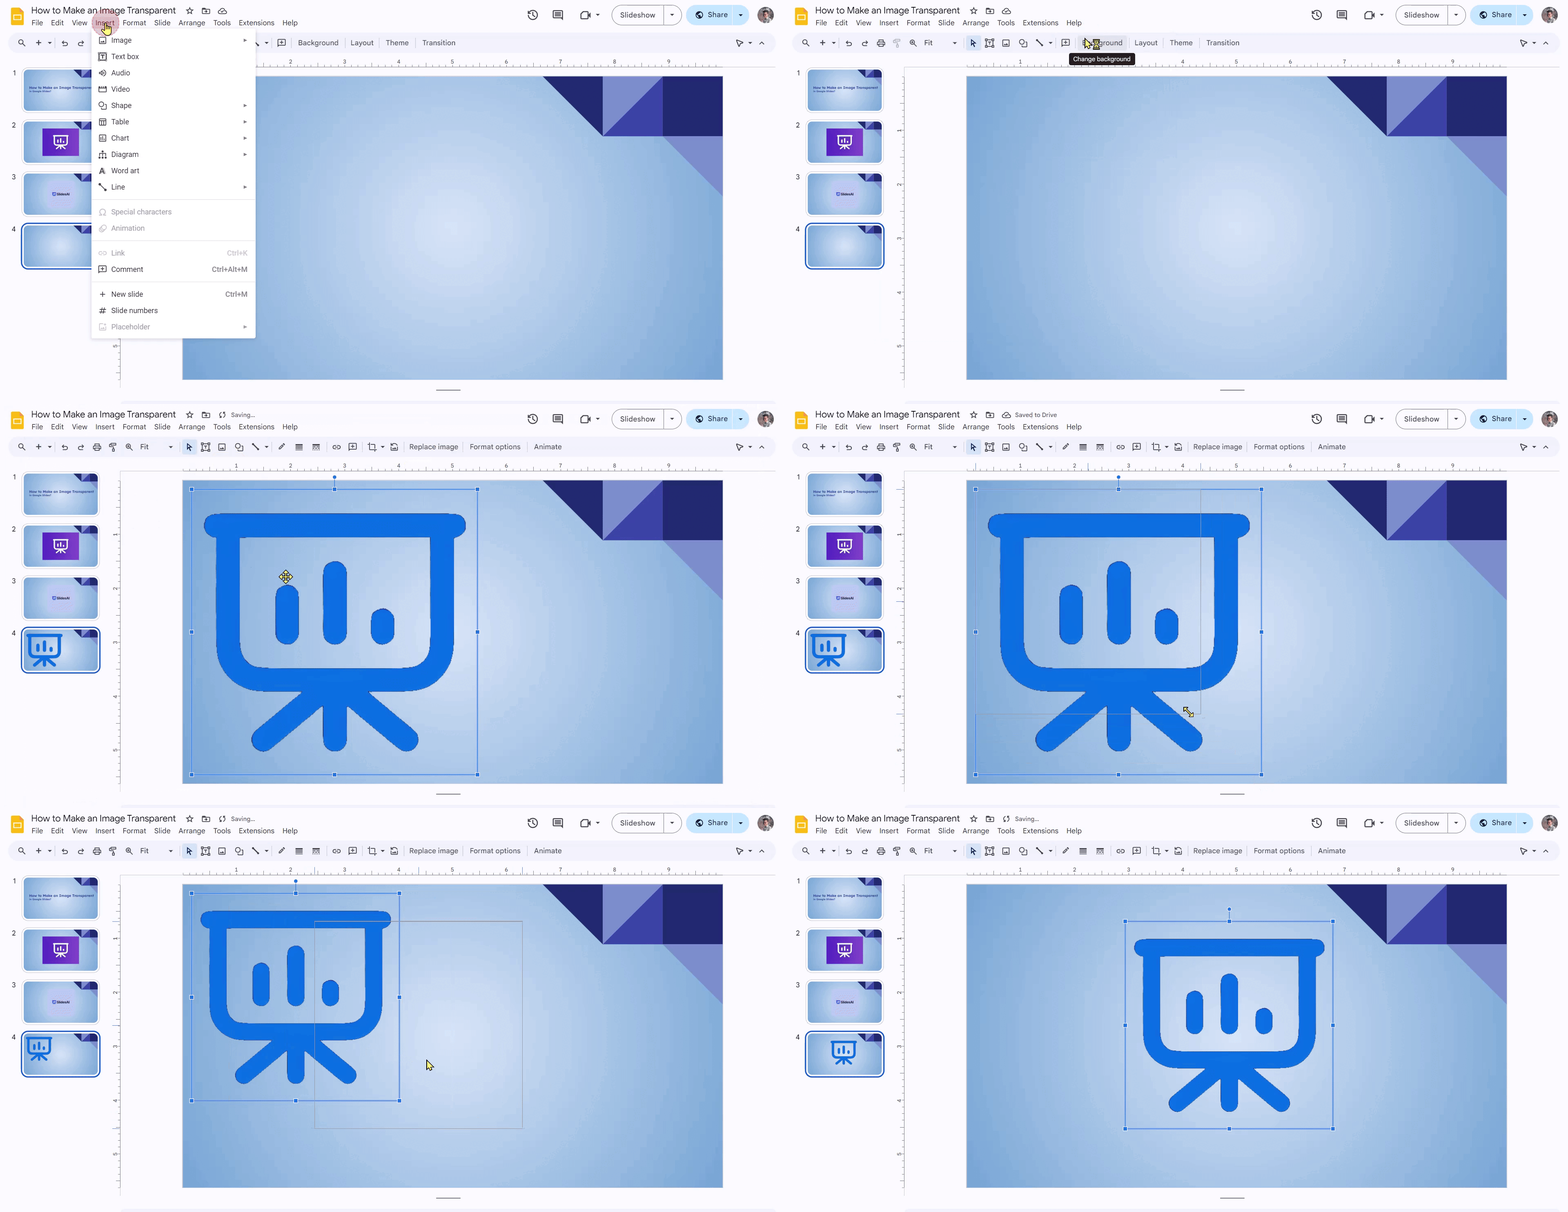
Step 1: Open a blank slide in Google Slides. Click “Insert” in the toolbar, then choose “Image” and upload a picture from your computer.
Step 2: Pick the image from your folder and click OK.

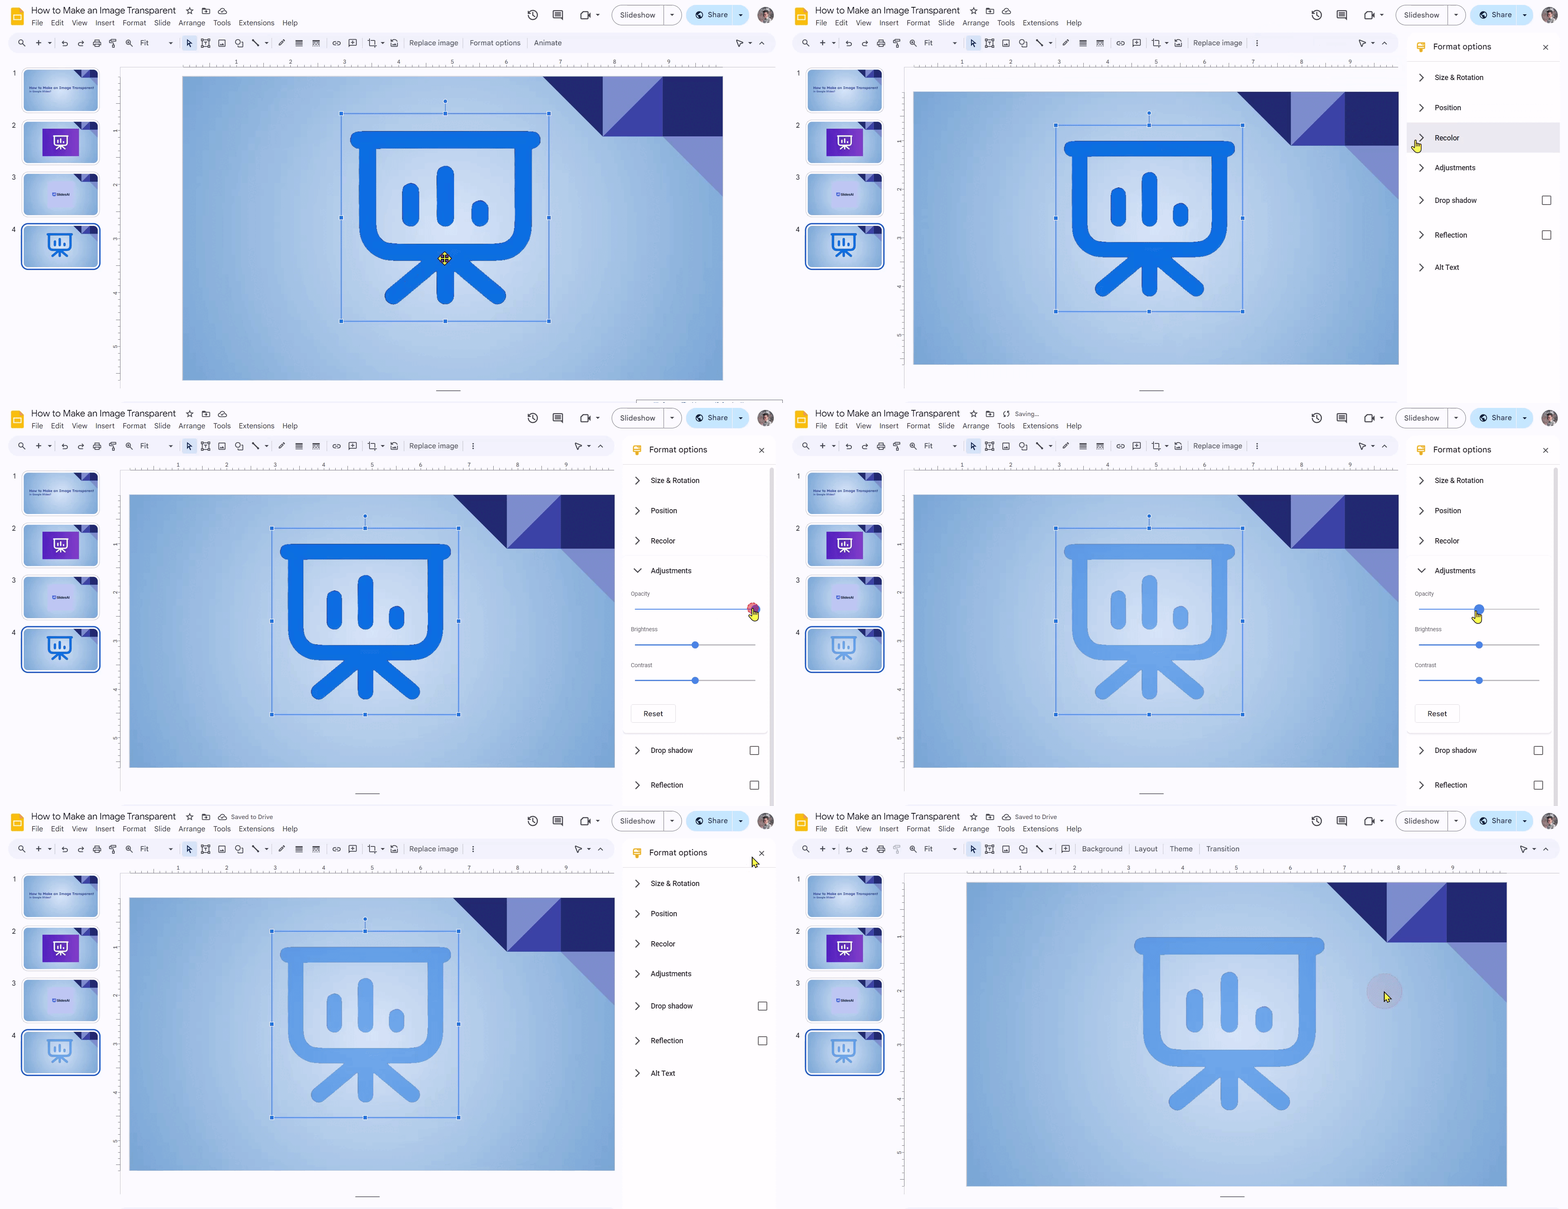
Step 3: Now, select the image, right-click, and choose “Format Options.”
Step 4: On the right side, a menu will appear. To make the image transparent, click on “Adjustments” and then “Transparency.”
Step 5: Adjust the transparency by sliding the Transparency slider. Move it to the right to make the picture more transparent.

Create Presentations Easily in Google Slides and PowerPoint
15M+Installs

How to Make a Shape Transparent in Google Slides?
Step 1: To make a shape transparent, start by inserting it. Click on the shapes option in the toolbar.
Step 2: Draw the shape as you like.
Step 3: Once you’ve chosen the shape, click on the Fill icon and pick a color.
Step 4: After filling in the color, click on the Fill icon again. At the bottom of the Fill window, click on the + Custom icon to open a new tab.
Step 5: Use the Transparency slider to set how see-through you want the shape. Once you’ve chosen the percentage, click OK. The shape will now be transparent.

How to Add Transparency Gradients to an Image or Shape in Google Slides?
Step 1: Choose the image or shape where you want a gradient effect.
Step 2: Click “Insert” in the top menu.
Step 3: Select the “Shape” option.
Step 4: Pick the specific shape you want the transparency gradient on.
Step 5: You can also make the border color transparent.
Step 6: Continue with the shape’s gradient by clicking on the “Fill color” option.
Step 7: Choose a gradient and create a custom one.
Step 8: Adjust the colors and transparency by adapting the gradient stops. Click “OK” for the final result.
Step 9: Customize the gradient further by adding more transparency gradients.
Step 10: Resize the gradient by changing the size of the selected shape.

Build Stunning Slides in Seconds with AI
- No design skills required
- 3 presentations/month free
- Don't need to learn a new software

Common Mistakes to Avoid When Using Transparency
Avoid these common errors to keep your slides polished:
- Making images too transparent, reducing visibility
- Using transparency on low-resolution images
- Applying transparency to important text backgrounds
- Overusing multiple transparent layers on one slide
- Ignoring contrast between text and background
Closing Thoughts
And there you have it – a complete guide to mastering transparency in Google Slides! With these techniques, you can take your presentations to the next level and really wow your audience. So go ahead, get creative, and let your ideas shine through with transparency in Google Slides.
Frequently Asked Questions
1. How Do You Make Part of an Image Transparent in Google Slides?
Currently, in Google Slides, you can make the whole image transparent, but you can’t adjust transparency for specific parts.
2. Does making an image transparent change its quality or resolution?
Adjusting transparency in Google Slides won’t reduce image quality. Just make sure the original image has good resolution.
3. How Do You Reset Images in Google Slides?
Select the image you want to reset, right-click on the image, and select reset image.
4. Can you use image transparency in Google Slides for any file format?
Certainly! Google Slides allows transparency for different image types like PNG and GIF, maintaining the intended look.


