
Google Slides is a popular and easy-to-use tool for making presentations. Whether you’re creating slides for school, work, or personal projects, it helps you design clear, attractive, and professional-looking slides. A simple trick to make your slides more vibrant and match your personal style or brand is learning how to change the shape color in Google Slides. This small step can improve the visual appeal and make your content stand out.
Steps to Change Shape Color in Google Slides
If you’ve ever asked yourself, “How to change shape color in Google Slides to match my style?” the answer is yes, you can, and here is how:
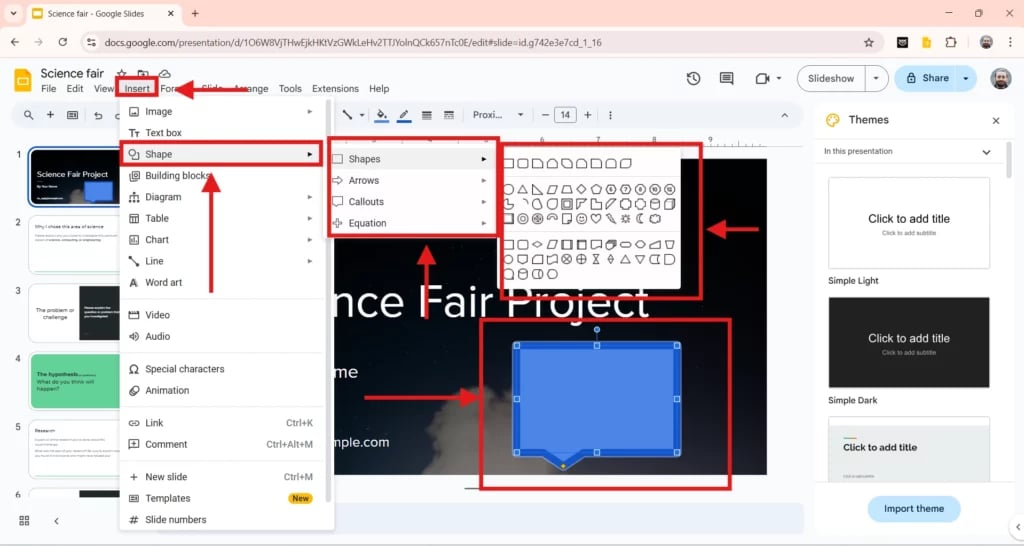
Step 1: Select Your Shape
First, open your Google Slides presentation and navigate to the slide with the shape you want to edit. Click on the shape, you’ll then see a blue outline around it, which means it’s selected and ready for changes. The beginning of the changing color of the shape in Google Slides starts here.
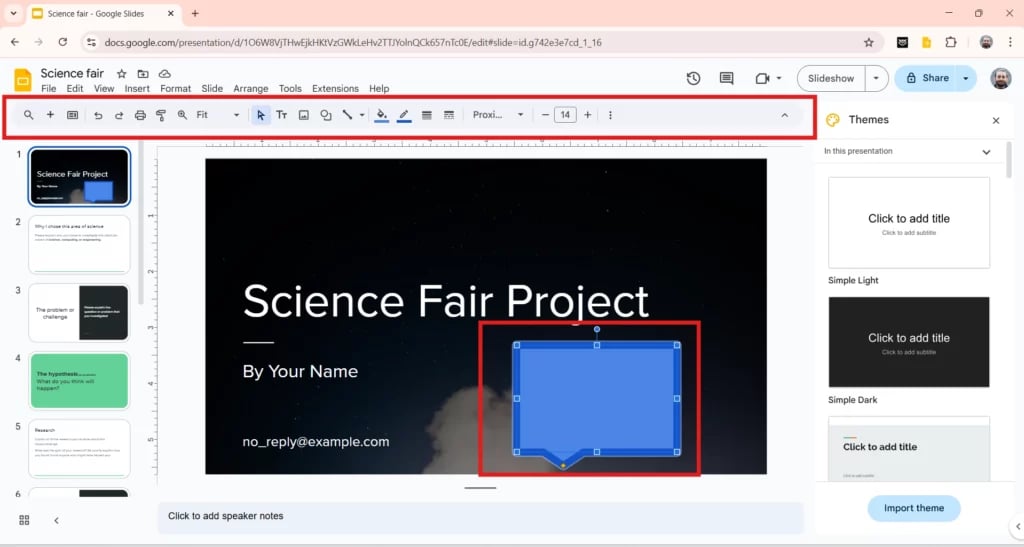
Step 2: Open the Fill Color Menu
At the top of your screen, look for the toolbar. Find the paint bucket icon that says “Fill color” when you take the cursor over it. Click on this icon to open a menu where you’ll see various color choices.
Step 3: Choose Your Color
You now have three color options to play with:
- Solid Colors: Pick from simple, ready-made colors.
- Custom Colors: Want a specific shade? Click on “Custom” and use the color wheel, type in a hex code, or enter RGB values.
- Gradient: For a stylish look, select a gradient that transitions between colors.
Step 4: Apply Your Color
Once you find the perfect color, click on it. You’ll instantly see the change in your shape. That’s how easy it is to change the shape color in Google Slides.
Step 5: Change the Border Color (Optional)
Next to the Fill color icon, you’ll notice a pen icon. This is the “Border color” button. Click on it if you want to change the outline color of your shape. You can also adjust the border thickness and style using the border weight and border dash icons. So, if you’re figuring out how to change the color of shapes in Google Slides and want to customize the border too, this step has you covered.
Now you know exactly how to change the shape color in Google Slides. With just a few simple steps, you can make your presentation brighter and more visually appealing. The next time you’re creating slides, take a moment to change color of a shape in Google Slides and see the difference it makes.
Frequently Asked Questions
How do I remove the fill color from a shape?
Click on the shape, open the Fill color menu, and choose “Transparent.” This will remove the color inside the shape, leaving only the border.
Can you change the color of shapes in Google Slides to match an image?
Yes! Use the Eyedropper tool found in the Fill color menu. It allows you to pick a color from any image and apply it to your shape.
How do I change the color of a shape inside a group?
Either right-click the group and select “Ungroup,” or double-click on the group to select one individual shape. Then, change the color of that specific shape.
How can I find the hex code of a color in Google Slides?
Click “Custom” in the color menu, and you’ll see the hex code at the bottom. You can copy that or input a custom code
How do I change the default shape color in Google Slides?
Google Slides doesn’t let you set a default shape color directly. However, you can design a Master Slide with your favorite shape colors and reuse that template anytime.