Programs like Google Slides and PowerPoint are great tools for creators and educators, especially online instructors. Adding a voice-over to your presentation can be a helpful way to explain things on the screen in more detail, guide viewers through complex topics, and make the learning experience more engaging for everyone.
While Google Slides doesn’t have a built-in voice-over recorder, adding narration is still possible. This article will explain how to do a voice-over on Google Slides in a few simple steps. Without waiting further, let’s dive in.
How to Add Voiceover on Google Slides?
Method 1: Using a Separate Audio File
Here’s how to add a pre-recorded voiceover to your Google Slides presentation using a separate audio file:
1. Craft Your Script: Plan your narration beforehand for a clear and engaging voiceover. Write a script that highlights the important points and complements the visuals on each slide.
2. Record Your Audio: Use external tools to capture your voiceover. Options include your phone’s recorder, a screen recorder with audio capabilities, or dedicated audio editing software.
Pro tip: Consider using an AI voice cloning tool for more realistic and customizable voiceovers.
3. Save in a Compatible Format: Ensure your recording saves in a format supported by Google Slides, such as MP3 or WAV. Most recording tools offer format options during the saving process.
4. Upload to Google Drive: Store your audio file in Google Drive for easy access within Slides. Drag and drop the file or use the upload function in Drive to do that.
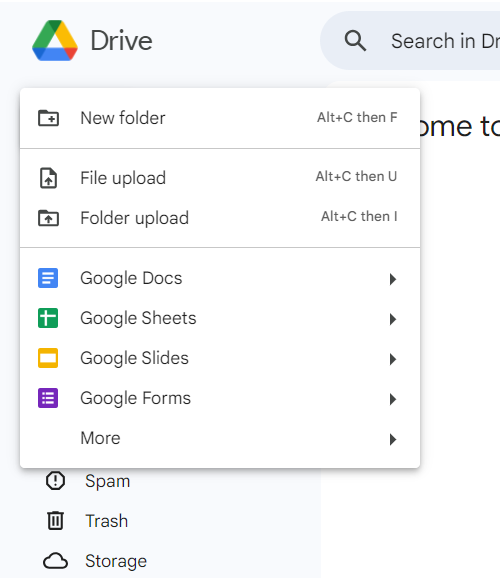
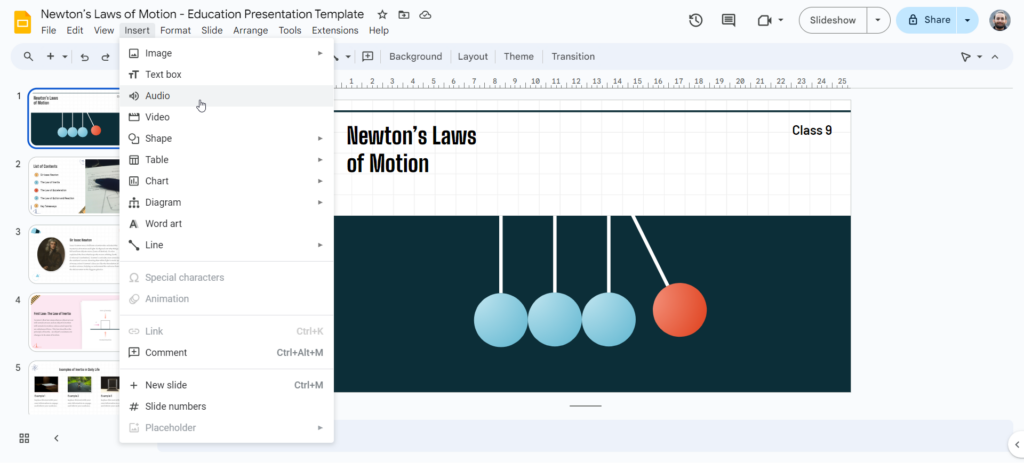
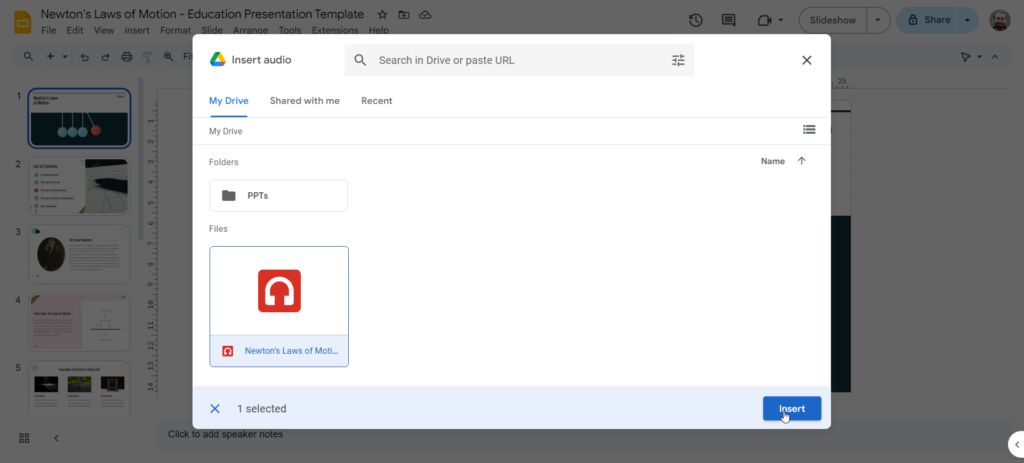
5. Insert Audio into Slides: Navigate to the specific slide where you want the voiceover to play. Go to “Insert” in the menu bar, then select “Audio.” Choose your uploaded file from Google Drive.
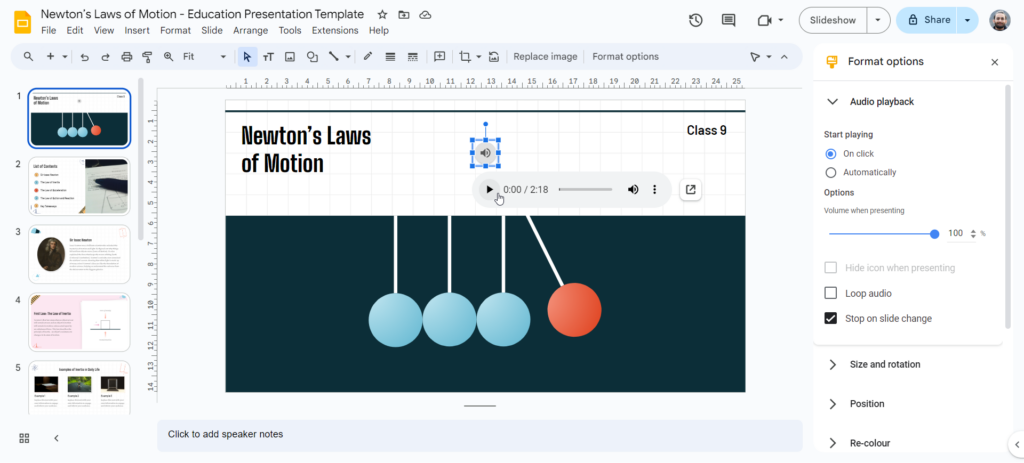
6. Fine-tune Playback: Use the audio formatting options to customize how the voiceover plays. You can set the start time to synchronize with your slide transitions, enable looping for continuous playback, and adjust the volume.
Create Presentations Easily in Google Slides and PowerPoint
15M+Installs
Also Read – How to Add Audio to Google Slides?
Method 2: Using Screen Recording with Audio (for Advanced Users)
This method is ideal for users comfortable with screen recording software.
1. Record Your Presentation With Narration: Use your computer’s built-in screen recording tool (or a third-party option) to capture your presentation slides along with your voice narration. Each recording will become a separate video file.
2. Insert the Videos Into Your Slides: Open each video file you created and insert them individually onto the corresponding slides in your Google Slides presentation.
Also Read: How to Add Narration to Google Slides?
Method 3: Adding Voice-Over While Presenting (Record During Slideshow)
While Google Slides doesn’t have built-in recording, you can narrate your presentation live:
- Access Slideshow Menu: Click “Slideshow” from the top menu bar.
- Start Recording: Select “Record slideshow” and choose your microphone.
- Narrate and Advance Slides: Click the “play” button and speak your narration as you manually click through the slides to advance them.
Things to Consider:
- This method captures all audio during the slideshow, including clicks and background noise.
- It’s a good option for quick narration, but for a polished presentation, you might need to edit the recording afterwards.
Also Read: How to Add Sound Effects to Google Slides?
When Should You Use Voice-Over in Google Slides?
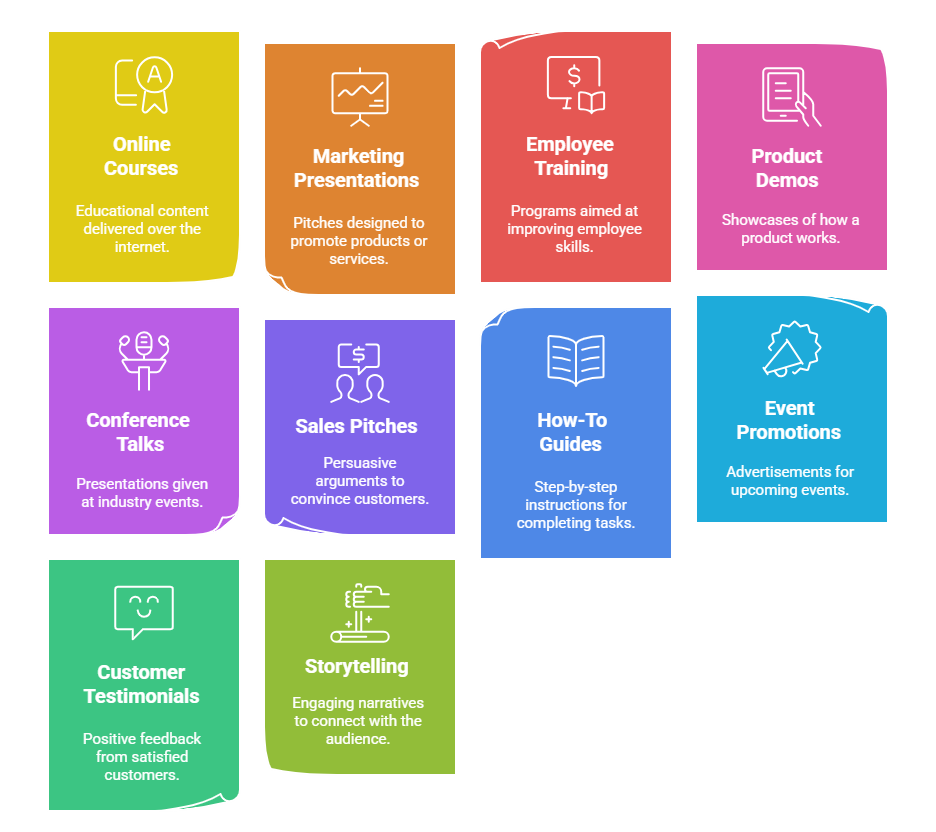
Here are some situations where voice-overs can be helpful in Google Slides presentations:
1. Online Courses: Adding narration to your educational slides can create a more complete online learning experience.
2. Marketing Presentations: Use voice-overs to explain the important features and benefits of your product or service in a clear and engaging way.
3. Employee Training: Create informative training modules with audio instructions for a more streamlined learning process.
4. Product Demos: Showcase your product’s functionality with a narrated demonstration that highlights its capabilities.
5. Conference Talks: Enhance your presentations by adding a professional voiceover that guides the audience through your content.
6. Sales Pitches: Strengthen your sales pitches with persuasive audio narration that emphasizes the value proposition.
7. How-To Guides: Provide clear and easy-to-follow instructions by adding voice-over narration to your step-by-step guides.
8. Event Promotions: Create engaging presentations for upcoming events that combine visuals with audio narration.
9. Customer Testimonials: Share customer testimonials with voice-over narration to add a personal touch and build trust. This approach allows us to delve into a comprehensive customer experience report, highlighting genuine feedback directly from those who’ve interacted with our products or services.
10. Storytelling: Combine visuals and audio narration to tell a compelling story that resonates with your audience.
Build Stunning Slides in Seconds with AI
- No design skills required
- 3 presentations/month free
- Don't need to learn a new software

Closing Thoughts
Adding a voiceover to your Google Slides presentation can significantly enhance its impact and audience engagement. Whether you choose pre-recorded narration, screen recording, or live delivery, the steps outlined in this guide will empower you to create informative and engaging presentations that leave a lasting impression. Remember to plan your script, select a high-quality audio format, and use the customization options in Google Slides to refine the playback for a perfect final product.
Frequently Asked Questions About Adding Voiceover on Google Slides
Can I add audio to Google Slides?
Absolutely! You can’t record directly within Slides, but you can insert audio files to create a voiceover effect.
What does adding a voiceover to Google Slides mean?
Adding a voiceover means incorporating narration into your slides. This can be anything from your own commentary to background music.
How can I record myself for Google Slides?
Google Slides doesn’t have a built-in recorder. Use a separate recording tool on your computer or phone. Save your recording as an audio file (MP3 or WAV) and then insert it into your slides.
Can I control how the audio plays in my presentation?
Yes! Once you insert the audio, a speaker icon appears. Clicking it lets you:
- Play/pause the audio
- Adjust volume
- Set it to play automatically on reaching the slide or require a click to start
